Have you ever wanted to install a Nokia phone theme or apps but everytime you do so, it says "Certificate Expired?". Fret no more, you can now install that Iron Man theme or the latest fancy mobile app you ever so wished.
Some software particularly of Symbian 60 version 3 gives "Certificate Expired" error. Isn't it annoying? The simple trick to overcome this is when you install those applications are:
1. Change your Nokia cellphone's date to Year 2006 or even lower,
2. After changing the date, that's the only time you install the application, and
3. After its installed change the date back to (i.e. 2008 )
Want more? That's it really..enjoy your new app or theme.
Showing posts with label Nokia Tips and Tricks. Show all posts
Showing posts with label Nokia Tips and Tricks. Show all posts
How to detect fake Nokia phones
Beware of fake Nokia cellphones being sold off EBay or the internet or even in your locality. Mostly these are from China with the design and packaging imitated from real Nokia phones. But not all phones Made In China are fake as Nokia has a plant in China that adheres to the strict standards of Nokia and supervised by Nokia itself.
Here are some red flag that tells if the Nokia phone you're eyeing is really a fake Nokia:
1. Low Price. Especially if its the latest Nokia phone models like Nokia N82, Nokia 5310, Nokia N95, Nokia N81, Nokia 6120, Nokia 6500 slide, Nokia 5610 Xpress Music etc.. and it is being sold at half or a third of the original price, which is an indicator that the unit might be fake.
2. The fake "Nokia" phones are lighter in weight than the original Nokia. Make sure to get a hold of the original Nokia phone in authorized Nokia resellers or Nokia dealers stores, if you plan to buy a brandnew or used Nokia phone off the authorized sellers.
3. Look for a 12-month Nokia warranty sticker ( usually says Limited Nokia Warranty ) slapped on top or side parts of the phone’s box.
4. Look also for a hologram showing Nokia connecting hands at one angle and the original enhancements logo at another angle in the battery. When you angle the hologram on the left, right, down and up sides of the logo, you should see 1, 2, 3 and 4 dots on each side respectively.
5. A tamper-proof label at the back of a unit and the type acceptance as part of one sticker and a Nokia tamper-proof warranty seal. Usually, for a Nokia phone to be totally serviceable and original (real), government regulation also requires a tamper-proof seal of a Telecommunications Agency or Department of the Government in charge of mobile phone use regulation, that is as if the sticker is one and the same as the tamper-proof label at the back of a unit.
Fake Nokia Pics
 Fake Nokia
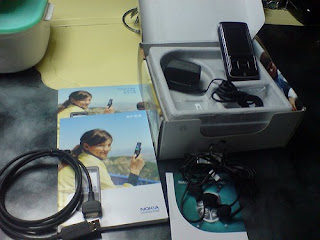 Fake Nokia


6. Mobile phone interface is not the traditional Nokia interface. Usually if it is, the languange is broken English or wrongly spelled words. Usually, the interface speed and handling is also slow in fake Nokia's. Watch out for the Nokia phone Manual too for these observations. Fonts of the fake Nokia is also sometimes different.
7. Fake Nokia phones usually cannot use Nokia's 3G phone capability like video call or surf the net in 3G. It also does not have wifi or radio, for Nokia phones with such capability.
Real Nokia Pics
8. Fake Nokia phones also have lower camera capability than the original. For example, an original Nokia 5610 Xpress Music phone has a 3.2 megapixel camera, the fake Nokia 5610 will usually have a 2 megapixel camera. Check the camera when buying, take a picture using the highest setting of the phone and take note of the size of the resulting photograph taken in kilobytes. If the kilobytes (kb) is around 200kb only for a 3.2MP camera at its highest setting of 3.2MP, then the Nokia phone is fake. A 3.2MP camera have 400+kb file size.
9. Check the usual Nokia secret codes/shortcuts. Usually fake Nokia phones have no such capability. To check for the IMEI Serial no. press *#06#, take note of the number, it should be the same as in the back inside of the phone and the Box that came with the Nokia phone. Check also the other Nokia secret codes like *#0000# that shows the Nokia cellphone's firmware version, firmware date and Nokia mobile phone code. You can also check the Service Warranty secret code for further protection, press *#92702689#.
10. The Nokia Phone Unit, Battery, Charger, Data cable, etc.. should have the Nokia Care sticker.
11. Usually, if you have a Symbian Nokia phone, the fake Nokia phone does not have the Symbian OS.
12. If you really want to make sure your Nokia phone is real, buyers should buy only from authorized Nokia dealers/stores.
Here are some red flag that tells if the Nokia phone you're eyeing is really a fake Nokia:
1. Low Price. Especially if its the latest Nokia phone models like Nokia N82, Nokia 5310, Nokia N95, Nokia N81, Nokia 6120, Nokia 6500 slide, Nokia 5610 Xpress Music etc.. and it is being sold at half or a third of the original price, which is an indicator that the unit might be fake.
2. The fake "Nokia" phones are lighter in weight than the original Nokia. Make sure to get a hold of the original Nokia phone in authorized Nokia resellers or Nokia dealers stores, if you plan to buy a brandnew or used Nokia phone off the authorized sellers.
3. Look for a 12-month Nokia warranty sticker ( usually says Limited Nokia Warranty ) slapped on top or side parts of the phone’s box.
4. Look also for a hologram showing Nokia connecting hands at one angle and the original enhancements logo at another angle in the battery. When you angle the hologram on the left, right, down and up sides of the logo, you should see 1, 2, 3 and 4 dots on each side respectively.
5. A tamper-proof label at the back of a unit and the type acceptance as part of one sticker and a Nokia tamper-proof warranty seal. Usually, for a Nokia phone to be totally serviceable and original (real), government regulation also requires a tamper-proof seal of a Telecommunications Agency or Department of the Government in charge of mobile phone use regulation, that is as if the sticker is one and the same as the tamper-proof label at the back of a unit.
Fake Nokia Pics
 Fake Nokia
 Fake Nokia

6. Mobile phone interface is not the traditional Nokia interface. Usually if it is, the languange is broken English or wrongly spelled words. Usually, the interface speed and handling is also slow in fake Nokia's. Watch out for the Nokia phone Manual too for these observations. Fonts of the fake Nokia is also sometimes different.
7. Fake Nokia phones usually cannot use Nokia's 3G phone capability like video call or surf the net in 3G. It also does not have wifi or radio, for Nokia phones with such capability.
Real Nokia Pics
8. Fake Nokia phones also have lower camera capability than the original. For example, an original Nokia 5610 Xpress Music phone has a 3.2 megapixel camera, the fake Nokia 5610 will usually have a 2 megapixel camera. Check the camera when buying, take a picture using the highest setting of the phone and take note of the size of the resulting photograph taken in kilobytes. If the kilobytes (kb) is around 200kb only for a 3.2MP camera at its highest setting of 3.2MP, then the Nokia phone is fake. A 3.2MP camera have 400+kb file size.
9. Check the usual Nokia secret codes/shortcuts. Usually fake Nokia phones have no such capability. To check for the IMEI Serial no. press *#06#, take note of the number, it should be the same as in the back inside of the phone and the Box that came with the Nokia phone. Check also the other Nokia secret codes like *#0000# that shows the Nokia cellphone's firmware version, firmware date and Nokia mobile phone code. You can also check the Service Warranty secret code for further protection, press *#92702689#.
10. The Nokia Phone Unit, Battery, Charger, Data cable, etc.. should have the Nokia Care sticker.
11. Usually, if you have a Symbian Nokia phone, the fake Nokia phone does not have the Symbian OS.
12. If you really want to make sure your Nokia phone is real, buyers should buy only from authorized Nokia dealers/stores.

Foodstuff to save wet Nokia Phone

If you dropped your phone in the toilet or the beach or anything that will make the Nokia phone wet, leave it turned off overnight in a bowl of uncooked rice. Huh? rice? Yes, rice, the uncooked one. Uncooked rice sucks out moisture.
One of just a few uses of rice. Only this time it's the healing qualities of rice. Some Nokia mobile phone enthusisasts also swears on the healing qualities of breakfast cereals and oatmeals.
Steps to Save Wet Nokia Cellphone
If you happen to wet your Nokia cellphone, submerge that Nokia phone in water or drop that Nokia mobile phone in water. Here are some steps you can take to save a wet Nokia cellphone:
1. Remove the Battery. This is one of the most important steps. Don't take time to think about it, electricity and water do not mix. Cutting power to your phone is a crucial first step in saving it.
2. Dry your Nokia Phone. Obviously you need to remove as much of the water as soon as you can to prevent it from getting into the phone. Use a towel or a paper towel to remove as much of the water as possible.
3. Soak in Alcohol. Alcohol is hygroscopic so it attracts water, it will dissolve all the water in the Nokia phone, which will then pour out of the phone with the alcohol. Any remaining alcohol will evaporate. Alcohol will not harm your phone but may mess up glue (from stickers and the like). Use 95% alcohol, not the regular 70% rubbing alcohol type. Do it outside!. If you use alcohol, do not follow the rest of the advice here, instead leave your phone outside for a day or two to dry.
4. Allow the phone to dry. Since you do not want to ruin your phone or lose all the numbers in your phone book, you need to allow the phone to dry. Don't try putting the battery back on to see if it works as this would risk damaging the phone with a short circuit. Leaving your phone in a bowl of dry rice will help to expedite moisture evaporation.
5. Heat your Phone. Apply enough heat to your phone to cause the water to evaporate without waterlogging your digital screen. One of the best things you can do to save a cell phone is to set it on the back of your computer monitor or TV screen over the heat vents. This is usually the perfect amount of heat to fix your phone. The convection action of the heat vents will help carry away the moisture in your phone. Leave the phone on the heat for at least 2-3 days. Another option is to leave it overnight in the oven on warm (make sure to take off the battery first).
6. Test your Phone. After you have waited 3 days, make sure everything is clean and dry looking and re-attach the battery to the phone and see if it works. If your phone does not work repeat step 4. If it still won't work, try taking your cell phone to an authorized dealer. Most of the time they can fix it.
7. Don't put the battery on for at least 3 days or longer if your digital screen is foggy.
8. The best way to dry out your phone is to place it in front of an air conditioner or air conditioning vent. Cold air won't damage your phone (hot air can warp or in extreme cases even melt plastic), and air from an air conditioner is dry, and so will evaporate water faster than you might think (which is why a car air conditioner will de-mist the windshield so effectively, even if the engine hasn't warmed up yet). Warm air from a reverse-cycle air conditioner works even better, of course. If you dry your phone in this way overnight it should be fine by the morning.
9. Use a hairdryer set on warm; it won't melt your head so your phone should be safe. Or use a food dehydrator. Or use the oven on the warm setting, make sure to take out the battery first though.
10. Don't heat the battery or it could leak acid. If you use an oven or hairdryer, make sure to remove the battery first.
If you use alcohol make sure to do so outside, and do not apply heat in any form, not even the gentle heat of a monitor. Do not hook up the bettery till the alcohol smell dissipates.
11. Do not apply heat to your phone other than mentioned above. You don't want to melt or burn your phone. Warranty fraud is naughty! If you dropped your phone in the can with your other 'droppings'–are you really going to send it in for a warranty tech to have to open? Yuck!
12. Most modern phones have more than one liquid damage indicator on them, only one visible to you (and sales/technician agents), and chances are, if the sticker under the battery is triggered (or would be, with the scotch tape trick), then the odds are that the internal stickers you can't access are tripped as well. This will still result in you paying a voided-warranty fee in the long run, and it may be best to just learn from your mistake (and not make it more financially severe!).
13. Even if all these steps are followed, minerals dissolved in the water can precipitate on solder and component pins, causing corrosion or shorting. Components pins are packed so closely together in a modern cell phone that even a small encrustation can create a short, rendering the phone inoperable.
1. Remove the Battery. This is one of the most important steps. Don't take time to think about it, electricity and water do not mix. Cutting power to your phone is a crucial first step in saving it.
2. Dry your Nokia Phone. Obviously you need to remove as much of the water as soon as you can to prevent it from getting into the phone. Use a towel or a paper towel to remove as much of the water as possible.
3. Soak in Alcohol. Alcohol is hygroscopic so it attracts water, it will dissolve all the water in the Nokia phone, which will then pour out of the phone with the alcohol. Any remaining alcohol will evaporate. Alcohol will not harm your phone but may mess up glue (from stickers and the like). Use 95% alcohol, not the regular 70% rubbing alcohol type. Do it outside!. If you use alcohol, do not follow the rest of the advice here, instead leave your phone outside for a day or two to dry.
4. Allow the phone to dry. Since you do not want to ruin your phone or lose all the numbers in your phone book, you need to allow the phone to dry. Don't try putting the battery back on to see if it works as this would risk damaging the phone with a short circuit. Leaving your phone in a bowl of dry rice will help to expedite moisture evaporation.
5. Heat your Phone. Apply enough heat to your phone to cause the water to evaporate without waterlogging your digital screen. One of the best things you can do to save a cell phone is to set it on the back of your computer monitor or TV screen over the heat vents. This is usually the perfect amount of heat to fix your phone. The convection action of the heat vents will help carry away the moisture in your phone. Leave the phone on the heat for at least 2-3 days. Another option is to leave it overnight in the oven on warm (make sure to take off the battery first).
6. Test your Phone. After you have waited 3 days, make sure everything is clean and dry looking and re-attach the battery to the phone and see if it works. If your phone does not work repeat step 4. If it still won't work, try taking your cell phone to an authorized dealer. Most of the time they can fix it.
7. Don't put the battery on for at least 3 days or longer if your digital screen is foggy.
8. The best way to dry out your phone is to place it in front of an air conditioner or air conditioning vent. Cold air won't damage your phone (hot air can warp or in extreme cases even melt plastic), and air from an air conditioner is dry, and so will evaporate water faster than you might think (which is why a car air conditioner will de-mist the windshield so effectively, even if the engine hasn't warmed up yet). Warm air from a reverse-cycle air conditioner works even better, of course. If you dry your phone in this way overnight it should be fine by the morning.
9. Use a hairdryer set on warm; it won't melt your head so your phone should be safe. Or use a food dehydrator. Or use the oven on the warm setting, make sure to take out the battery first though.
10. Don't heat the battery or it could leak acid. If you use an oven or hairdryer, make sure to remove the battery first.
If you use alcohol make sure to do so outside, and do not apply heat in any form, not even the gentle heat of a monitor. Do not hook up the bettery till the alcohol smell dissipates.
11. Do not apply heat to your phone other than mentioned above. You don't want to melt or burn your phone. Warranty fraud is naughty! If you dropped your phone in the can with your other 'droppings'–are you really going to send it in for a warranty tech to have to open? Yuck!
12. Most modern phones have more than one liquid damage indicator on them, only one visible to you (and sales/technician agents), and chances are, if the sticker under the battery is triggered (or would be, with the scotch tape trick), then the odds are that the internal stickers you can't access are tripped as well. This will still result in you paying a voided-warranty fee in the long run, and it may be best to just learn from your mistake (and not make it more financially severe!).
13. Even if all these steps are followed, minerals dissolved in the water can precipitate on solder and component pins, causing corrosion or shorting. Components pins are packed so closely together in a modern cell phone that even a small encrustation can create a short, rendering the phone inoperable.
Subscribe to:
Posts (Atom)